Many of us know that SSD have better performance than traditional HDD. What is the reason for this? Why do we often choose SSD over HDD?
This is because that SSD perform better than HDD. Compared with HDD, SSD runs smoother, has faster read and write speeds, better performance and reliability, stronger durability, more energy saving, and lower noise. It is also due to these advantages and lower prices that SSD is becoming more and more popular with users.
More and more Windows users are also trying to upgrade old HDD to SSD for better performance. Therefore, copying HDD to SSD is a wise choice. Clone HDD to SSD means that copy HDD to SSD. All data and files including operating system, applications, partitions and settings on the HDD will be transferred. Unfortunately, the cloned SSD won’t boot in Windows 10/8/7. The reason that the cloned SSD fails to boot may be that the source disk sector you cloned is damaged, the system may be damaged, the drive letter may have been changed, and so on. So is there any way to migrate to SSD from HDD without booting problems?
Absolutely yes, here is a third-party software available to help users achieve it. AOMEI Backupper is a professional Windows backup software, which supports system, partition, disk and file backup and restore. What’s more, it also supports cloning such as disk cloning, system cloning and partition cloning. It has a free version of AOMEI Backupper Standard Edition that contains most of the features and can clone disk for free. With it, users can copy HDD to SSD easily. Moreover, users can successfully boot from the cloned SSD. Now, let’s take a look at how to migrate to SSD from HDD with AOMEI Backupper Standard.
How to Clone HDD to SSD without Booting Problems with AOMEI Backupper Standard?
Before begin copying HDD to SSD, remember to make the following preparations to let the cloning process successful:
- If there are files on the SSD, make sure to do a backup before cloning the disk, as cloning the HDD to the SSD will erase all data on the target device. AOMEI Backupper Standard can help us make backups and ensure our data is safe forever.
- Ensure that the partition style of the target disk is consistent with the source disk.
- Need to check the partition style of HDD and SSD.
Now, let’s start cloning.
Step 1. Connect HDD / SSD with computer.
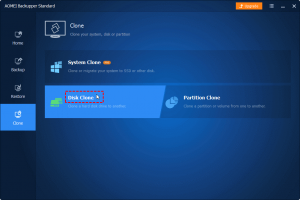
Step 2. Download and launch AOMEI Backupper Standard for free. Click “Clone” from the left hand side menu and then click “Disk Clone”.
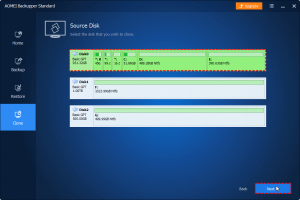
Step 3. Select the HDD containing the operating system as the source disk.
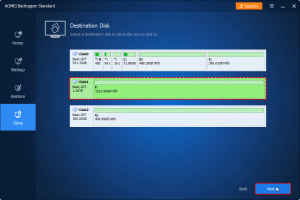
Step 4. Select SSD as the target disk.
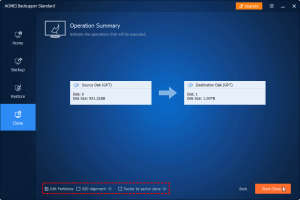
Step 5. Preview the information of the source and target disks. At the bottom of this page, set advanced settings as you need. These advanced settings can help users clone more stable and smooth drives.
- Select the “Edit Partition” option to adjust the size or position of the partition on the target disk. There are some options: a) copy without resizing partitions; b) add unused space to all partitions: c) manually adjust partition size.
- If the target disk is an SSD, selecting “SSD Alignment” option will ensure sector alignment during the clone process and optimize SSD performance.
- If selected “Sector by sector clone”, it will clone all sectors, even if the sectors are empty. Normally, to save target disk space, we do not need to check this option. Unchecking this option will only clone the used portion of the source disk, so less space is required on the destination.
Step 6. At last, click “Start Clone”. Wait for the process to complete. Users will find that they have successfully cloned HDD to SSD without boot issues.
Conclusion
The above is a detailed guide to clone HDD to SSD. If you are still looking for an easier way to copy HDD to SSD without boot issues, AOMEI Backupper Standard is definitely the most powerful and useful disk cloning tool you need to try. It makes our complicated and troublesome data backup, cloning and recovery issues a fast, easy and successful thing. Hope it will help you a lot.

